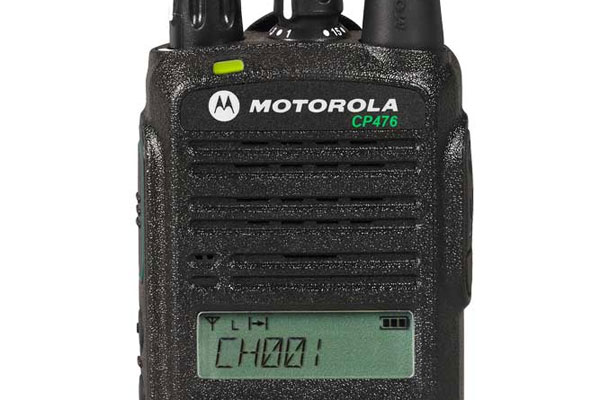
Motorola CP476 is by far one of the best radios on market in Australia & New Zealand. And they can take a lot of wear and tear. But eventually, your radio starts to look a little tatty. Well, there’s a make it look new again.
Required Parts
The following parts are required to refurbish your Motorola CP476.
| Part Code | Description | Why? |
|---|---|---|
| PMDN4183 | Motorola CP476 Front Housing | This is the actual housing. This part replaces PMUE3140. |
| PMDN4102 | Motorola CP476 Volume Knob | A volume knob finished the job. |
| PMDN4092 | Motorola CP476 Name Badge | The PMDN4183 housing does not come with the name badge. |
Optional Replacement Accessories
The following parts are recommended but optional. But in order to fully refurbish your Motorola CP476, you should really also buy the following items.
| Part Code | Description | Why? |
|---|---|---|
| PMDN4038 | Chassis & Knob Opener | This will make your life easier. Essential if you’re doing more than 1. |
| PMDN4039 | Crab Eye Nut Opener | Special order only. |
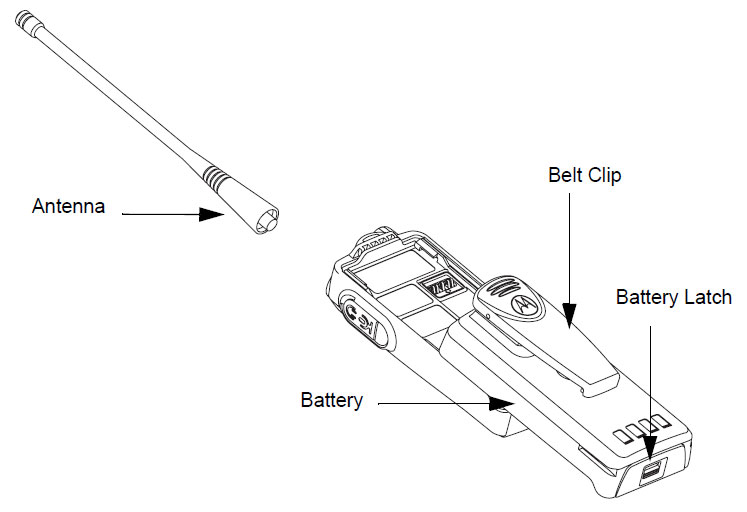
| PMAE4016 | Motorola CP476 Replacement Antenna | Antenna might be tatty. |
| PMNN4476 | Motorola CP476 Replacement Battery | Battery may no longer hold charge. |
| HLN9844 | Motorola CP476 Belt Clip | Belt clips snap all the time. |
Optional Replacement Accessories
These spare parts are the most frequently replaced parts. Most parts in this table are special order only.
| Part Code | Description | Why? |
|---|---|---|
| PMDN4116 | O-Ring Seal. | This deteriorates faster than any other part. |
| PMDN4067 | Speaker | When you get distorted audio, it’s usually the speaker. When there’s no audio, it’s the on board audio chip (not repairable). |
| PMDN4067 | Speaker Felt | The housing usually comes with this. |
| 0980683Z01 | Audio / Accessory Jack Socket | This is where accessories plug in. When pins snap, they tend to get stuck in here and then requires replacing. |
| 0915184H01 | Battery Contacts | |
| PMDN4123 | LCD Screen | |
| PMDN4109 | Flex Cable | |
| PMDN4118 | Silicone Keypad | |
| PMDN4124 | PTT Button Only |
Motorola CP476 Disassembly & Reassembly Procedure
When disassembling and reassembling the radio, it is important to pay particular attention to the snaps and
tabs, and how parts align with each other.
1. Turn OFF the radio.
Switch off the radio by turning the volume knob all the way down until you hear a click.
2. Remove the battery & antenna.
Remove the battery. With the back of the radio facing you turn the radio upside down. You will see a battery latch. Slide it to the unlock position and then slide the battery down.
Remove the antenna by simple unscrewing it.
3. Remove volume kob.
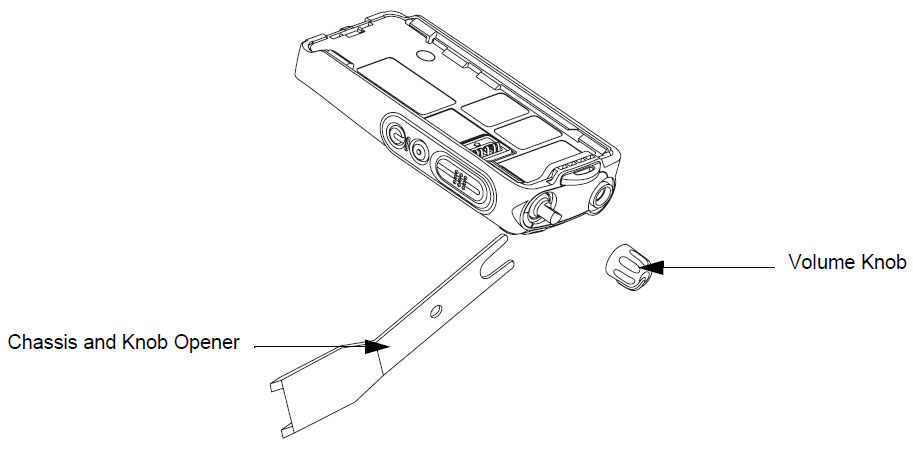
4. Separate The Chassis & Front Housing.
Insert the Chassis and Knob Opener in between the thin retaining wall and the chassis at the bottom of the radio. Do not mar the O-ring sealing area on the housing.
Slowly pry the bottom of the chassis from the housing by pushing the Chassis and Knob Opener downwards, and prying the handle of the tool over and behind the base of the radio. This forces the thin inner plastic wall toward the base of the radio thus releasing the two chassis base tabs.
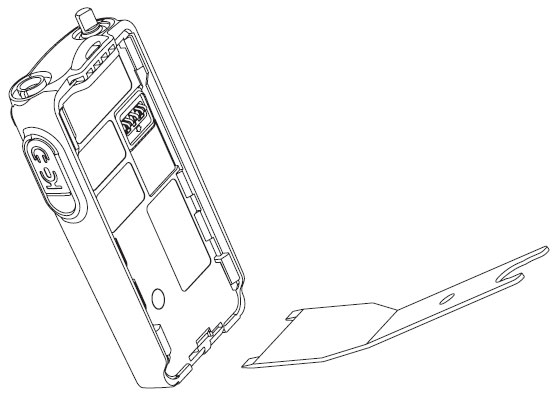
Slide the rear chassis downwards, and away from the front housing. Be careful not to damage the Flexible Cable (38) and speaker wire underneath.
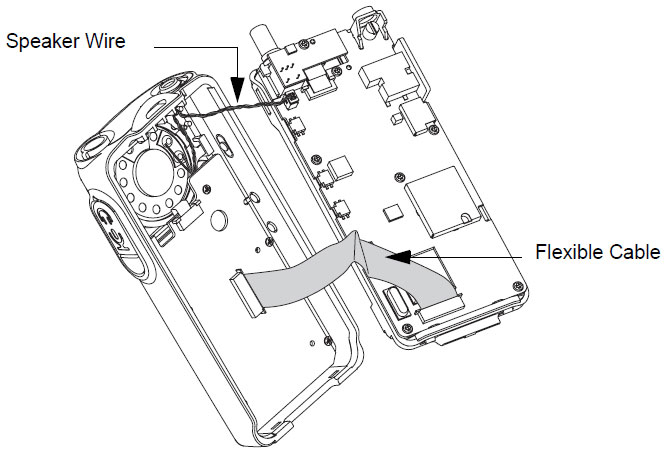
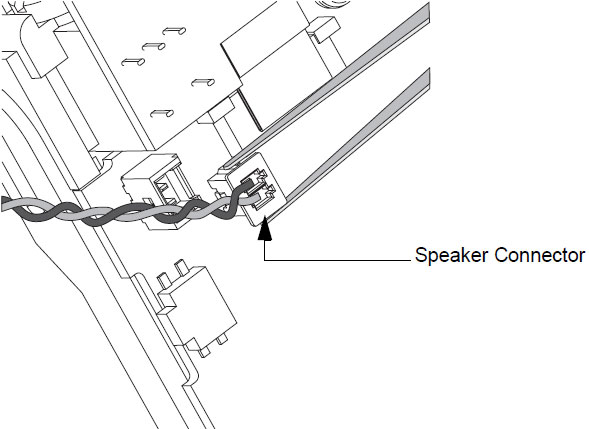
Remove the speaker wire connector connecting the main circuit board and the internal speaker on the front housing with the tweezers.
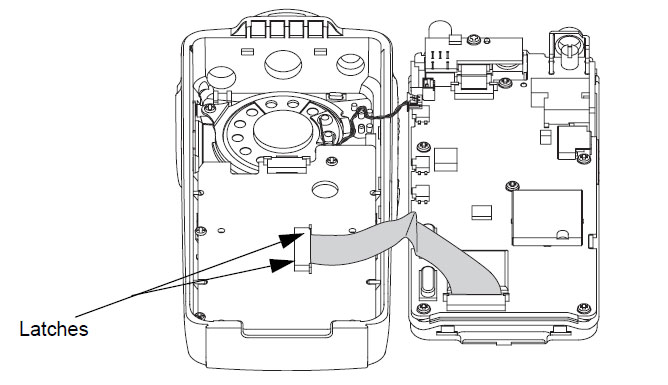
Lay the front housing down. Rotate the chassis sideways from the Front Housing Assembly and lay it down. Push the latches on the Front Circuit Board sideways to the right to release the flexible cable from the connector.
5. Reassembly
Please follow the previous steps in reverse.
Slide the On/Off Volume Knob Shaft into the respective holes in the front cover.
Insert top chassis tabs into the recesses on the front cover and apply some force until the tabs are fully inserted.
Be sure the O-ring (23) is properly seated so that the radio is properly sealed.
Snap the bottom of the chassis into the front housing.

Re-attach antenna and battery.
Read Also
How to program the Motorola CP476